
WordPress वेबसाईट के लिए Live Search बॉक्स कैसे लगाए
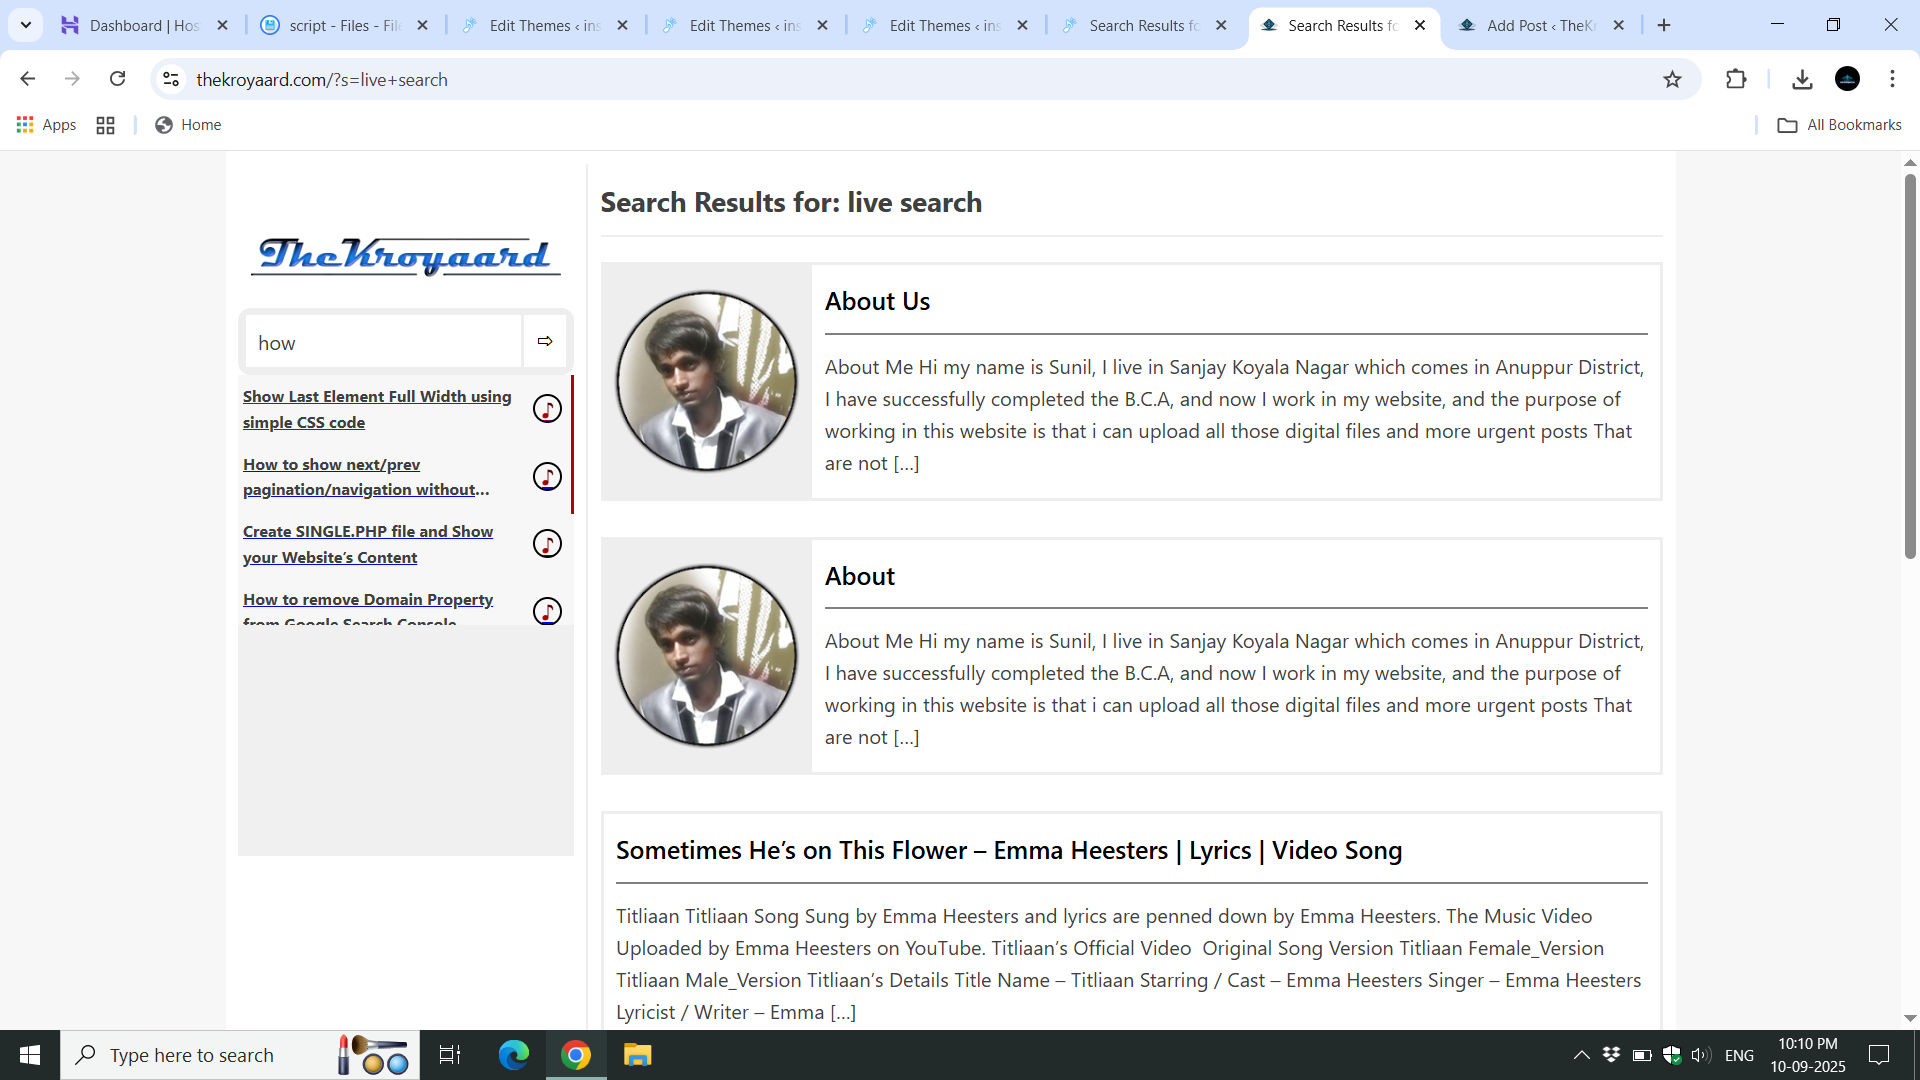 आप अपनी wordpress वेबसाईट मे लाइव सर्च बॉक्स लगा सकते हैं । उसके लिए आप नीचे दिए हुए कोड को अपनी theme मे implement कर सकते हैं । तो चलिए step by step सीख लेते हैं ।
पहला स्टेप
आप इस कोड को वहाँ पर paste करो जहा आपको लाइव सर्च बॉक्स चाहिए ।
<div class="header-search-box">
<div class="search-box">
<form class="tksearch" method="get" action="<?php echo esc_url( home_url( '/' ) ); ?>" autocomplete="off" >
<input type="text" name="s" placeholder="Find ..." id="live-search" class="tksearchTerm" value="<?php echo get_search_query(); ?>"> <button class="tk-rightsign-icon" value="" type="submit" aria-label="Search"></button></form>
<span class="tk-loading-icon" id="loading-icon" style="display: none;"></span>
<div class="search_result" id="search-results"></div>
</div>
<button class="searchbtn" onclick="toggleSearch()" aria-label="Toggle Search"><span class="tk-search-icon"></span></button>
अब आप इसको save कर दें ।
दूसरा स्टेप
अब आप functions.php फाइल मे नीचे दिए हुए कोड को paste करें ।
// Live Search
function enqueue_live_search_script() {
    wp_enqueue_script(
        'live-search',
        get_template_directory_uri() . '/script/live-search.js',
        array(), // No dependencies
        wp_get_theme()->get('Version'),
        true
    );
    wp_localize_script('live-search', 'liveSearch', array(
        'ajax_url' => admin_url('admin-ajax.php')
    ));
}

add_action('wp_enqueue_scripts', 'enqueue_live_search_script');
function live_search() {
    $query = isset($_POST['search_query']) ? sanitize_text_field($_POST['search_query']) : '';
    if (!empty($query)) {
        $args = array(
            's' => $query,
            'post_status' => 'publish',
            'posts_per_page' => 6, // Limit results
'post_type'      => 'post',
        );
        $search_query = new WP_Query($args);
        $total_posts = $search_query->found_posts;
        if ($search_query->have_posts()) {
            while ($search_query->have_posts()) {
                $search_query->the_post();
                echo '<ul>
                        <a href="' . get_permalink() . '"><li>' . get_the_title() . '</li><span class="search-music-icon-post"></span></a>
                      </ul>';
            }
            wp_reset_postdata();
            // Show "See More" if there are more results
            if ($total_posts > 5) {
                echo '<div class="search-item see-more">
                        <a href="' . get_site_url() . '/?s=' . urlencode($query) . '">Click Here for More</a>
                      </div>';
            }
        } else {
            echo '<div class="search-item">No results found.</div>';
        }
    }
    die();
}

add_action('wp_ajax_live_search', 'live_search');
add_action('wp_ajax_nopriv_live_search', 'live_search');
अब इसे भी save कर दें ।
तीसरा स्टेप
अपनी थीम के folder मे जाएँ और live-search.php के नाम से एक फाइल बनाएँ और नीचे दिए हुए कोड को वहाँ पेस्ट कर दें ।
document.addEventListener("DOMContentLoaded", function () {
const searchInput = document.getElementById("live-search");
const resultsContainer = document.getElementById("search-results");
const loadingIcon = document.getElementById("loading-icon");
if (searchInput) { // Make sure the search input exists
searchInput.addEventListener("keyup", function () {
let query = searchInput.value.trim();
if (query.length > 0) { // Search starts immediately
loadingIcon.style.display = "inline-block"; // Show loading icon
let xhr = new XMLHttpRequest();
xhr.open("POST", liveSearch.ajax_url, true); // Use localized AJAX URL
xhr.setRequestHeader("Content-Type", "application/x-www-form-urlencoded");

xhr.onreadystatechange = function () {
if (xhr.readyState === 4 && xhr.status === 200) {
loadingIcon.style.display = "none"; // Hide loading icon
resultsContainer.style.display = "block";
resultsContainer.innerHTML = xhr.responseText;
}
};
xhr.send("action=live_search&search_query=" + encodeURIComponent(query));
} else {
resultsContainer.innerHTML = "";
resultsContainer.style.display = "none";
}
});
} else {
console.error("Live search input not found.");
}
});
अब इसे भी save कर दें ।
अंतिम स्टेप (optional)
अब आप या तो अपने द्वारा CSS coding कर के design कर सकते है या मेरे दिए हुए CSS कोड का उपयोग कर सकते हैं ।
.search_result, .search-box .tk-loading-icon {
position: absolute;
background: #f7f7f7;
z-index:9999;
}
.search_result {
max-height: 200px;
overflow: auto
}
.search_result::-webkit-scrollbar {
    display: block
}
.search_result::-webkit-scrollbar {
    width: 3px
}
.search_result::-webkit-scrollbar-thumb {
    background: #035680;
}
.search_result a:hover {
    background-color: #fff
}
.search_result ul li{
    padding: 5px 0;
    color: #3f3f3f;
    font-weight: 700;
    display: -webkit-box;
    margin: 0;
    -webkit-line-clamp: 2;
    -webkit-box-orient: vertical;
    text-overflow: ellipsis;
overflow: hidden
}
.search_result ul {
    padding: 0;
    list-style: none;
    margin: auto
}
.search_result ul a {
    display: grid;
    grid-template-columns: 89% 10%;
    gap: 1%;
    align-items: center;
    margin: 0px;
    max-height: 46px;
    overflow: hidden;
    padding: 4px;
    font-size: 80%
}
.search-item {
padding: 0 10px;
margin-bottom: 10px }
अब इसे भी save कर दे ।
इन्ही तरीकों से आप अपने वेबसाईट मे live search बॉक्स लगा सकते हो । पर ध्यान रखिए अगर आपकी वेबसाईट shared hosting मे है तो आप इसका उपयोग न करे तो अच्छा रहेगा ।